Step One
The first step to solving this puzzle is piecing the graph paper back together. To start, I opened the image-editing program I use most often: paint.net. paint.net is lightweight and easy to get used to. Although it lacks the sophisticated features of PS, I have never been setback with the features it does possess.
To piece it together, I used the crop tool to copy/paste each sliver of paper onto a new file. From here, it becomes obvious that lining up the paper is more of a challenge than it seems.
For starters, I looked at the punch-holes in the graph paper and set these off to the left. The alphabet and shaded squares helps determine the y-axis of each sliver. Next, I noticed that there were solid lines separating the alphabet and solid lines separating blank squares. I crossed out each paper as I pasted them to ensure I didn’t have duplicates – and as I was analyzing each piece, I noticed an upside-down coordinate plane. I made sure to put this in the bottom left.
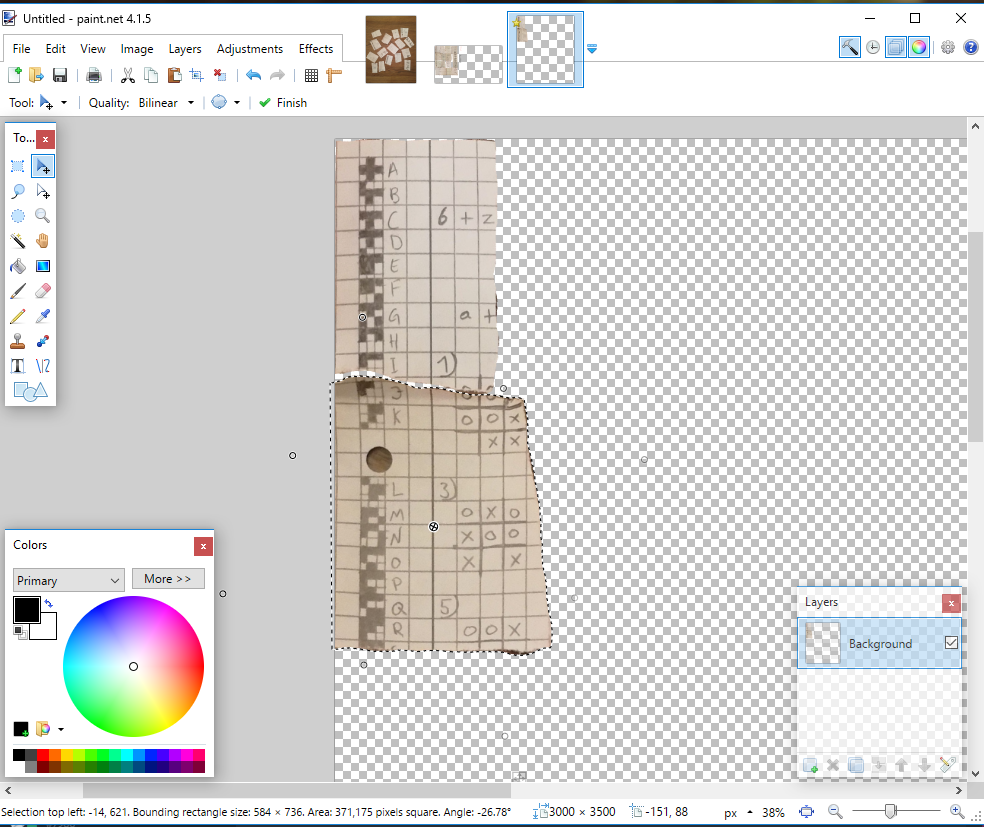
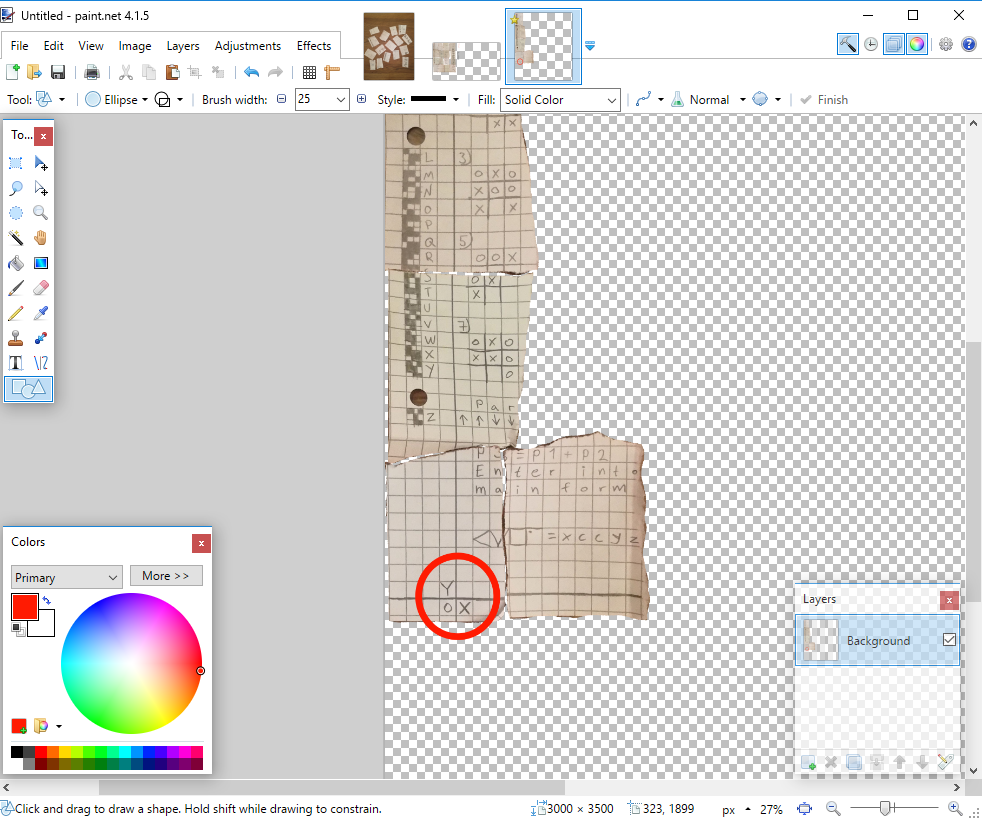
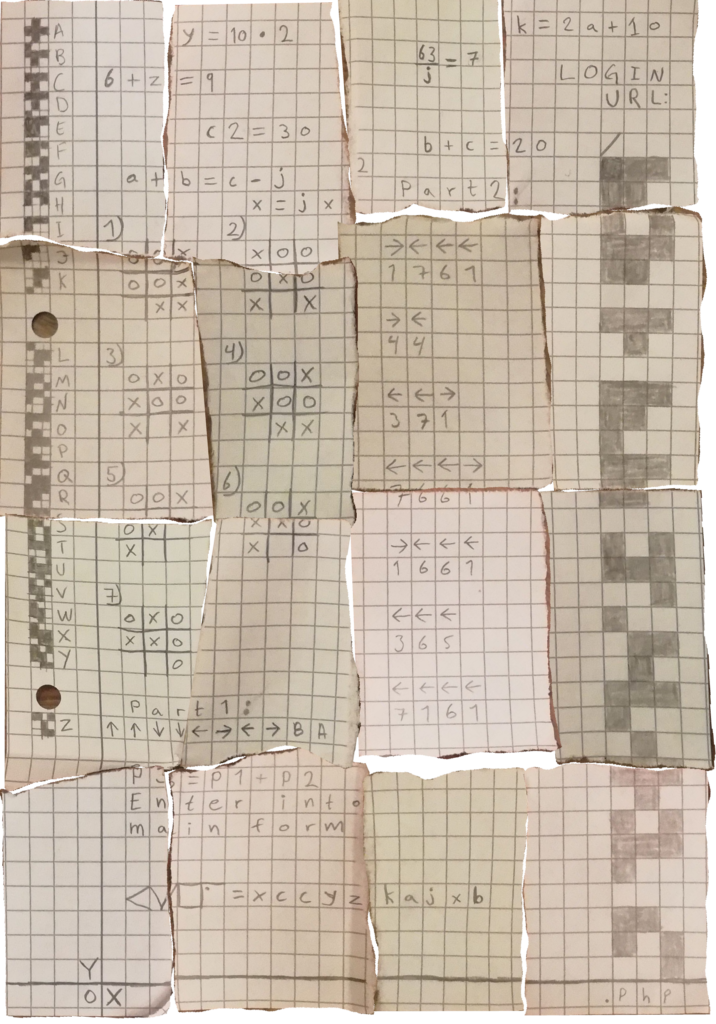
There are some tricky parts when it gets to the center of the page, but since the graph paper makes it easier to line up text and shading, it didn’t take too long. Below is the finished version of the page.
Step Two
The next thing I did was sectioned the graph into smaller puzzles.
- First, we have the “alphabet” cipher on the left that seems to correlate to the right.
- Next, we have the algebraic equations at the top.
- The tic-tac-toe should be sectioned off
- Finally, it seems as if “P3 = P1 + P2” refers to the parts the author created.
- Part one is the Konami code, so we should combine this with Part 2 somehow.
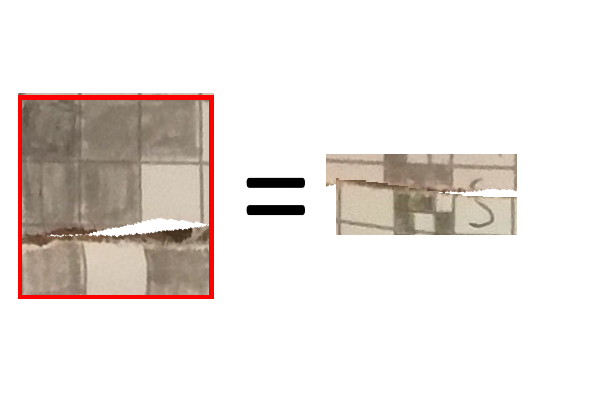
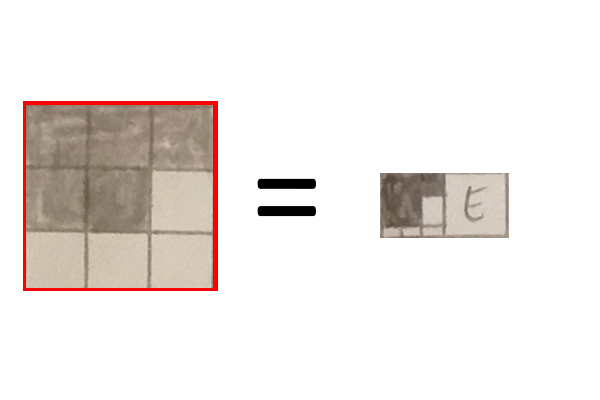
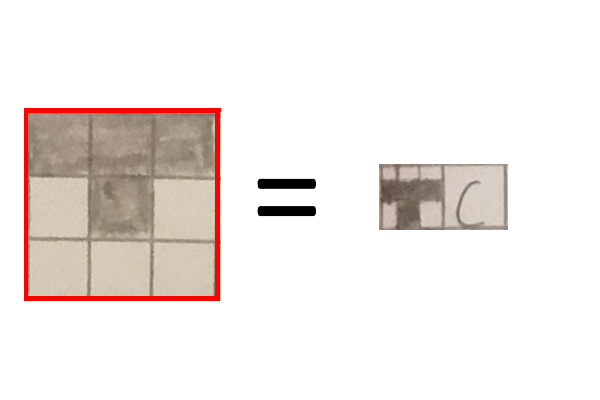
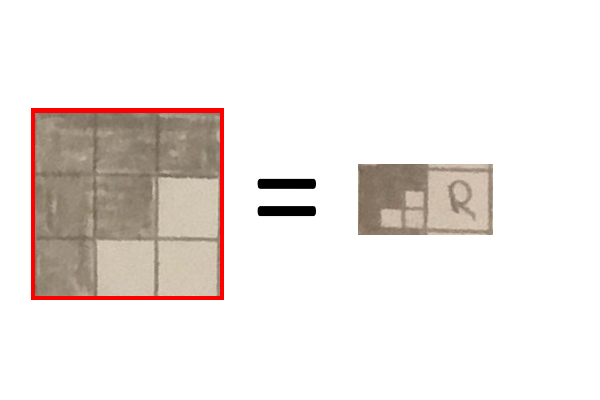
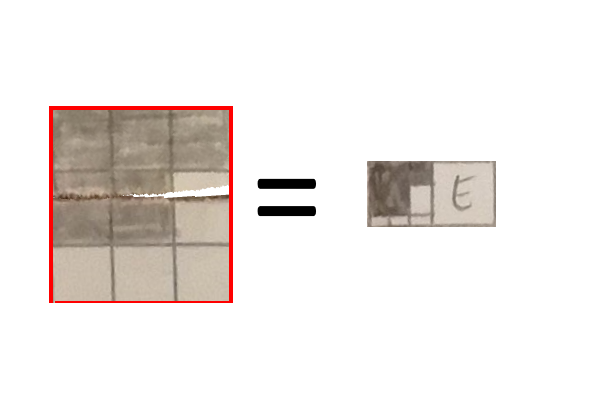
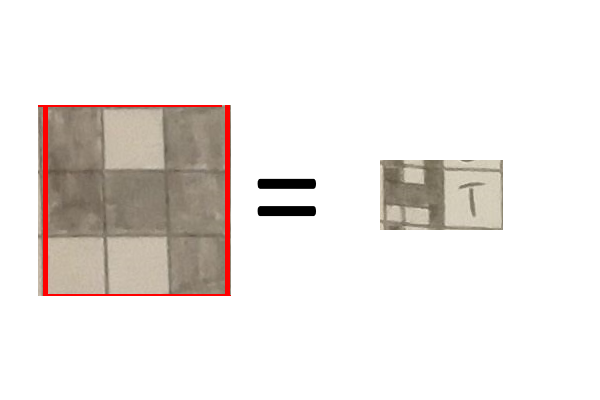
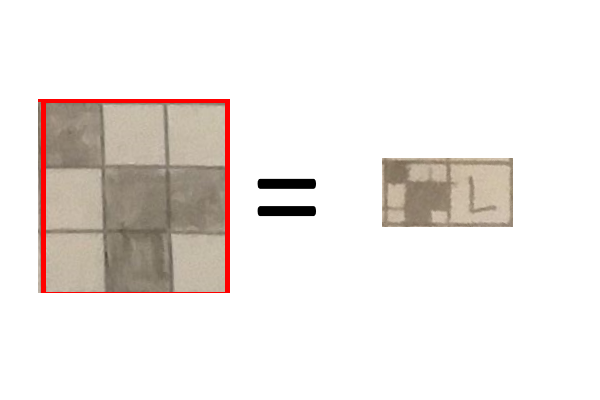
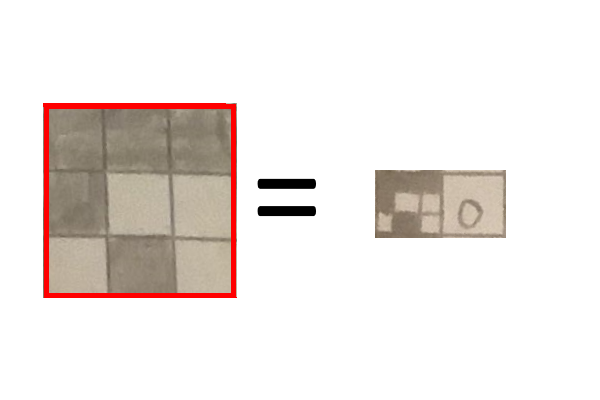
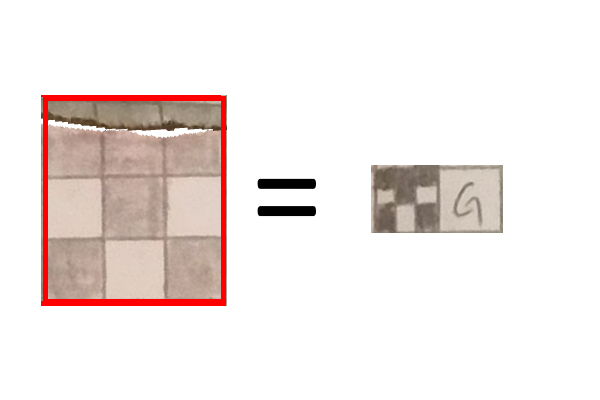
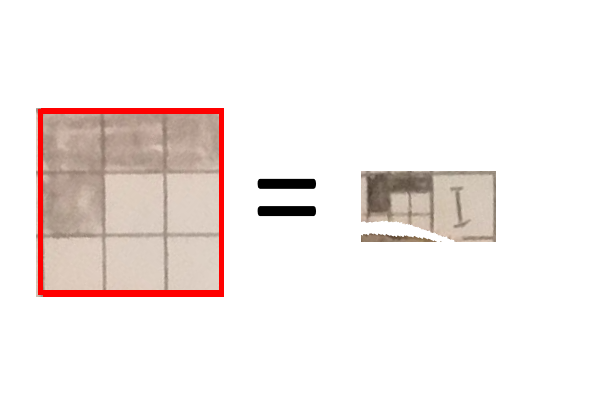
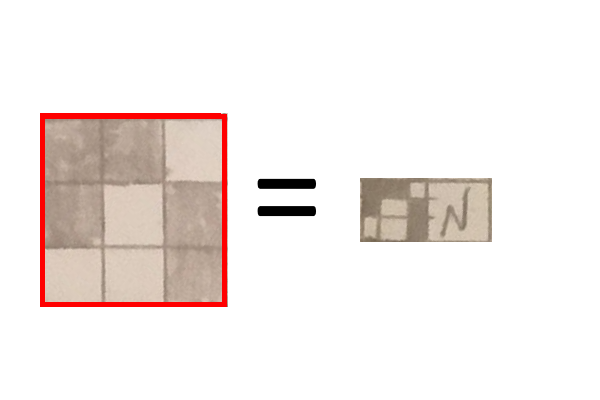
Starting with the alphabet cipher, it appears that each letter is assigned to a 3×3 grid which correlates to the right side of the page. I separated each block on the right into it’s own 3×3 grid.
Using the key on the left, I compared each grid to it’s value.
The answer we get is secretlogin with the .php extension underneath. As the ARG originated on reddit from mollekake, I went to his website and crafted the URL with the secretlogin.php page added. This worked successfully, and we are presented with a simple username and password request.
Step Three
Since I didn’t really know where to go from here, I started with the algebra at the top of the page. The following statements are presented:
- 6 + z = 9
- y = 10 * 2
- 63/j = 7
- b + c = 20
- a + b = c – j
- x = j * 2 (this was corrected by mollekake, as the 2 does not line up properly)
- c2 = 30
- k + 2a + 10
With any math problem, start with the obvious equations where there is one variable. From this we can determine the following:
- 6 + z = 9
- z = 3
- y = 10 * 2
- y = 20
- 63/j = 7
- j = 9
- 2c = 30
- c = 15
From here, we can begin to solve the multi-variable equations using substitutions from the letters we know:
- b + c = 20
- b + (15) = 20
- b = 5
- b + (15) = 20
- a + b = c – j
- a + (5) = (15) – (9)
- a = 1
- a + (5) = (15) – (9)
- x = j * 2
- x = (9) * 2
- x = 18
- x = (9) * 2
- k + 2a + 10
- k + 2(1) + 10
- k = 12
- k + 2(1) + 10
To sum up all of our letters alphabetically, here is our key:
- a = 1
- b = 5
- c = 15
- j = 9
- k = 12
- x = 18
- y = 20
- z = 3
Step Four
Looking around for a place to use these letters, the bottom of the page seems the most realistic. On the left hand side of the equal sign, we see a “<” and “v” character, as well as a square and a dot within an L. This is known as a pigpen cipher. Decrypting it gives us “user” which references the username on the secretlogin page.
Next, the letters relate to the key that we made. Off the bat, I noticed that all the numbers are relatively small, and I attempted a simple alphanumeric substitution cipher, where A=1, B=2 and so on. This was the result:
- x = 18
- 18 = R
- c = 15
- 15 = O
- y = 20
- 20 = T
- z = 3
- 3 = C
- k = 12
- 12 = L
- a = 1
- 1 = A
- j = 9
- 9 = I
- b = 5
- 5 = E
Inserting the duplicate letters changes our string “xccyzkajxb” into “rootclaire“.
Step Five
Going back to the site’s secretlogin.php page, I entered rootclaire as the username and “password” as the password. After discussion with the mollemysteries Discord community, it was determined that this was meant to be bruteforced with simple password attacks.
We are greeted with a congratulations for completing the first section of the puzzle. However, the tricky part with the arrows and tic-tac-toe boards still remain.
Step Six
I spent days on this section of the puzzle, trying to figure out how the arrows and the boards correlated. It boils down to a pretty simple answer: braille.
Essentially, we look at each arrow and the number above it. The number determines which tic-tac-toe board we look at, while the arrow determines which two-thirds of the grid we pay attention to. Here is an example:
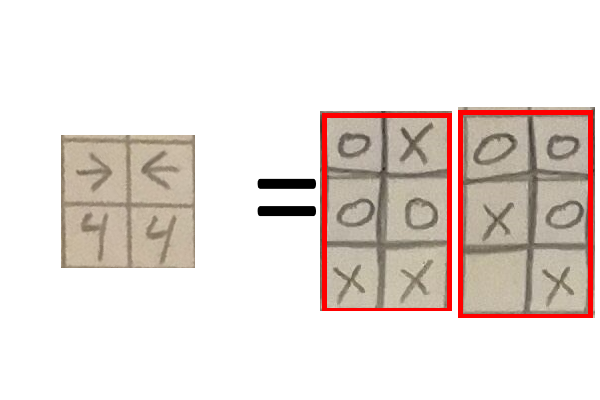
The grid encased in the red is the same board, just different sides determined by the arrows. If we correlate the O’s to numerical braille dots, we get an entirely new set of numbers. The following list converts each set of number to the new set, from top to bottom:
- 1767
- 2137
- 44
- 84
- 371
- 512
- 7661
- 1332
- 1667
- 2337
- 365
- 536
- 7161
- 1737
Step Seven
Now, we look towards coordinates now. mollekake frequently incorporates coordinates into his puzzles, and this one is no different. If we treat each one as a pair, we can determine certain letters on the graph based on their coordinates. This is also where the x and y planes come in handy. Here is the graph with the coordinates marked and the letters sectioned off
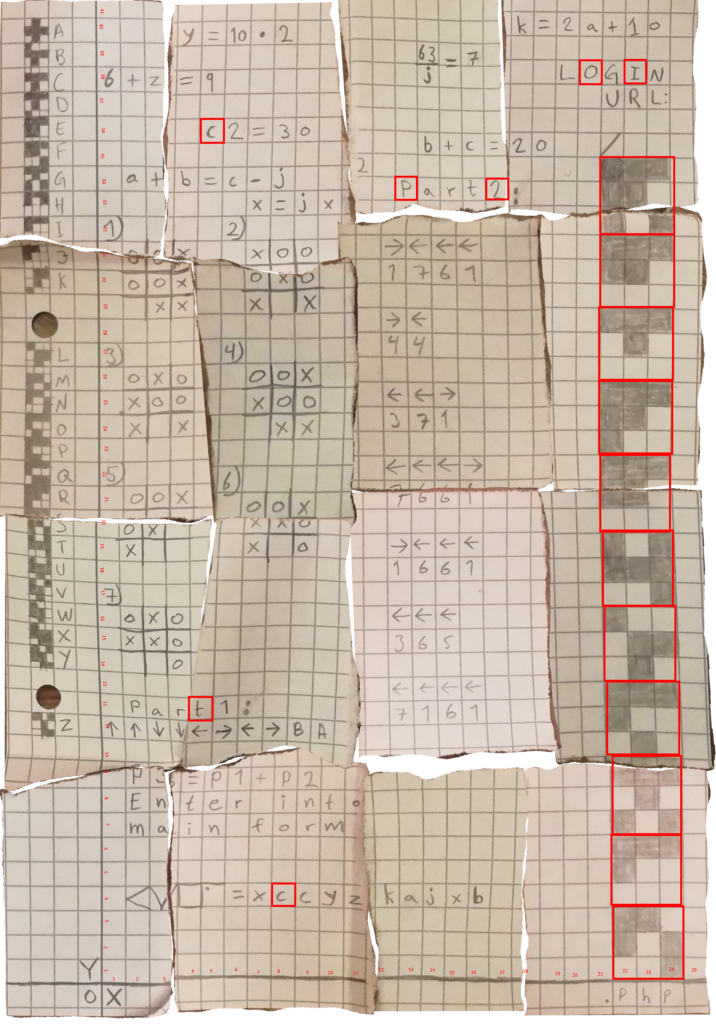
The string we get from this is “OctPIc2” although capitals don’t matter, so “octpic2” suffices.
Step Eight
Now we return to “P3 = P2 + P1”. We know that Part 1 is related to the konami code, and Part 2 is octpic2. Going to the main form of the website, and entering “konamioctpic2” gives us a new picture.
Step Nine
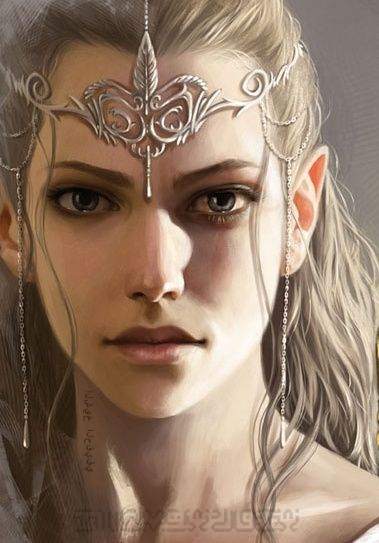
This image gave me some trouble, but I found that messing with the contrast and colors of the image allowed the bottom characters to show up better. I decided to ignore the Arabic text due to the difficulty of translating it. I believed that the woman in the photo was either related to Zelda, due to an eye symbol that appears in red when changing the contrast.
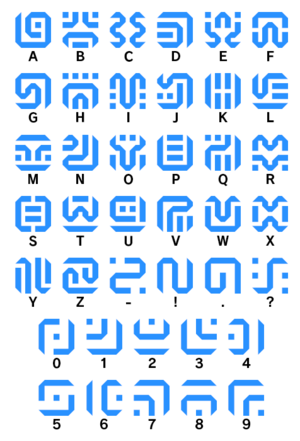
After some Google research on “Zelda eye symbol”, I found that the official name for it is the sheikah eye. Apparently, sheikah is also a language within The Legend of Zelda, and I found a handy legend to translate it by hand.
After working on the conversions, I translated the text at the bottom of the image to “mytruename“
Step Ten: The Solution
After entering “mytruename” and realizing I was wrong, I took it to be a literal string.
Entering “zelda” into the main form will solve the puzzle. Congratulations!
Summary
In this ARG, we used:
- Image Manipulation
- Encoding/Decoding via cipher
- Mathematical Solving
- Alphanumeric Cipher
- Pigpen Cipher
- “Braille” Cipher
- Coordinates
- More Image Manipulation
Overall, this was a pretty challenging puzzle in disguise. The initial steps were easy enough, but the tic-tac-toe and arrow section took a lot of time to solve and think about, even after mollekake released some small hints about it. If you enjoyed this, feel free to follow more of his puzzles on reddit, and come back to CyberCrack for more write-ups.

